Transform Photos by Erasing Unwanted Scenes Behind Your Subject
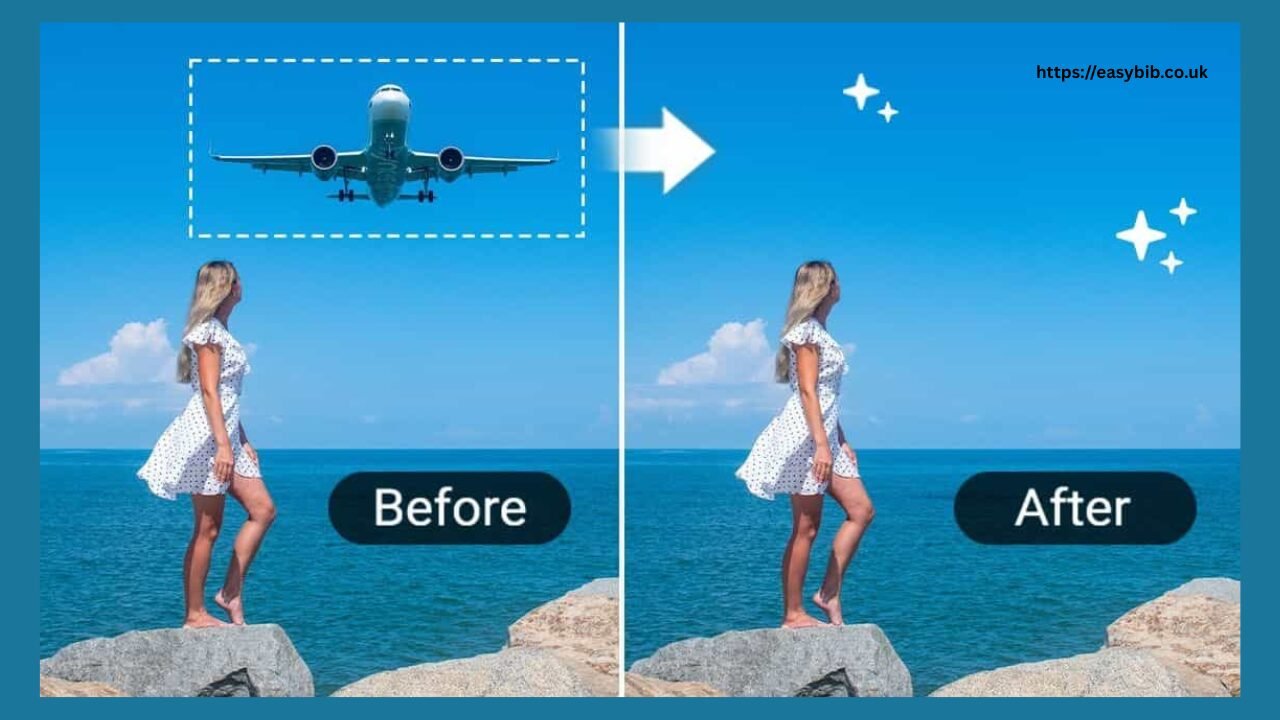
Are you tired of taking photos that don’t fully capture your vision because of messy or distracting backgrounds? Unwanted objects and clutter can detract from your main subject, leaving your images looking sloppy and unprofessional. The good news is that modern photo editing tools make it easy to remove these distractions and instantly enhance your photos.
By learning simple techniques, you can turn ordinary shots into polished, eye-catching images. Please keep reading to discover how to make your photos look their absolute best.
The Importance of Background in Photography
The background plays a crucial role in photography. It can either make the subject stand out or distract from it. A messy background can take attention away from the main topic.
Clean and straightforward backgrounds help the viewer focus on the subject. They make the photo look balanced and stronger. This enhances the emotional impact of the image.
Choosing the right background is as important as the subject or lighting. Minor edits, such as removing clutter or adjusting colors, can significantly improve a photo. Paying attention to the background makes every photo look better and more professional.
What You Need to Know Before Removing Backgrounds
Before you start removing backgrounds, it’s essential to know some basic principles. Ensure your subject stands out clearly against the background, as this will make editing much easier. Proper separation between the subject and the background helps you create cleaner and more precise selections.
Pay close attention to the edges of your subject, especially if there are fine details, such as hair or patterned clothing. These areas can be tricky and may require extra care to avoid rough cuts. Understanding these challenges beforehand will make your background removal process smoother and your final image more professional.
Choosing the Right Tools
Selecting the right tools is essential for effective background removal. Options range from professional software like Adobe Photoshop, which offers powerful editing features, to beginner-friendly platforms like Canva and Fotor that make background removal quick and simple. Free alternatives like GIMP also offer strong capabilities, providing you with numerous options to suit your skill level and needs.
Step-by-Step Guide to Removing Unwanted Scenes Behind Your Subject
Choosing the right tools is key to removing unwanted backgrounds effectively. You can use professional software like Adobe Photoshop for powerful editing.
Step 1: Selection of Your Subject
Start by selecting the subject in your image. Most editing tools offer various selection methods, such as lasso, magic wand, or quick selection tools. Take the time to complete this step accurately; a well-defined selection will yield better results.
Step 2: Refine Edges
After selecting your subject, smooth the edges to blend it naturally with the new background. This step is crucial, especially if your subject has intricate details. Use tools like ‘Feather’ or ‘Refine Edge’ to smooth the selection for a more natural look.
Step 3: Remove the Background
Once you’re satisfied with the selection, you can remove the background. Most tools have a simple command that allows you to erase the uncovered areas. Make sure to check for leftover artifacts or shadows that might distract from your main subject.
Step 4: Add a New Background
After removing unwanted backgrounds, you can enhance your image by adding a new one. Choose a solid color, gradient, or another photo based on the mood you want to create. For example, a soft gradient can evoke a sense of calm, while a vibrant background adds energy.
Considerations for Effective Background Removal
When removing backgrounds, paying attention to contrast can significantly improve your final image. A background that contrasts with your subject helps it stand out and draws the viewer’s eye. Maintaining consistent lighting on the subject and background makes the photo appear natural and professional.
Color harmony is another key factor to consider. Choosing background colors that complement your subject enhances the overall visual appeal of your work. Using a background with equal or higher resolution than your subject keeps the image sharp and polished.
Common Mistakes in Background Removal
When removing backgrounds, it’s easy to make mistakes that affect the final image. Over-editing is a common pitfall, where excessive adjustments can make your subject appear unnatural. Keeping edits subtle usually creates a more polished and realistic result.
Poor edge selection is another issue, as rushed selections can leave jagged or messy edges around your subject. Taking your time ensures a clean and professional look. Maintaining the same aspect ratio when adding a new background is crucial for a balanced and visually appealing image.
Enhancing Your Skills
If you’re new to background removal, online courses and tutorials on YouTube or Skillshare can help you learn the basics. Watching step-by-step guides shows you how to use the tools and techniques correctly. You can also pick up tips that make editing faster and easier.
Practice is the best way to improve your skills. Try removing backgrounds in various settings, such as outdoor scenes, events, or studio photos. Using different tools and edits helps you find what works best and improves your photos over time.
Final Touches to Elevate Your Photo
Once you’ve completed the basic editing, adding final touches can elevate the quality of your photograph. Adjust sharpness, brightness, and contrast to polish your image further. Adding filters can give your photo an artistic touch and enhance its appearance without detracting from the subject.
Save and Share
After finishing your image, save it in the correct format for online or print use. You can also explore platforms to create your image background remover. This makes it easier to do similar edits more often.
READ MORE
Elevate Your Photos with Simple Edits
Mastering the removal of unwanted backgrounds can significantly alter the appearance of your photos. With the right tools and techniques, you can make your subjects stand out and create sharp, professional-looking images. Start practicing these edits today, and you’ll see how quickly your photos can go from ordinary to extraordinary.
Dive into our blog to learn more tips and tricks that will take your photography to the next level.