The Role of Scope Mounts in a Reliable Shooting Setup
There’s a moment of quiet satisfaction when your rifle setup feels just right—the cheek weld is comfortable, the sight picture is clear, and the chosen scope mounts hold everything in perfect alignment. While they may seem like small accessories, mounts are the critical link between your optic and your rifle, and they play a massive role in accuracy, comfort, and long-term reliability.
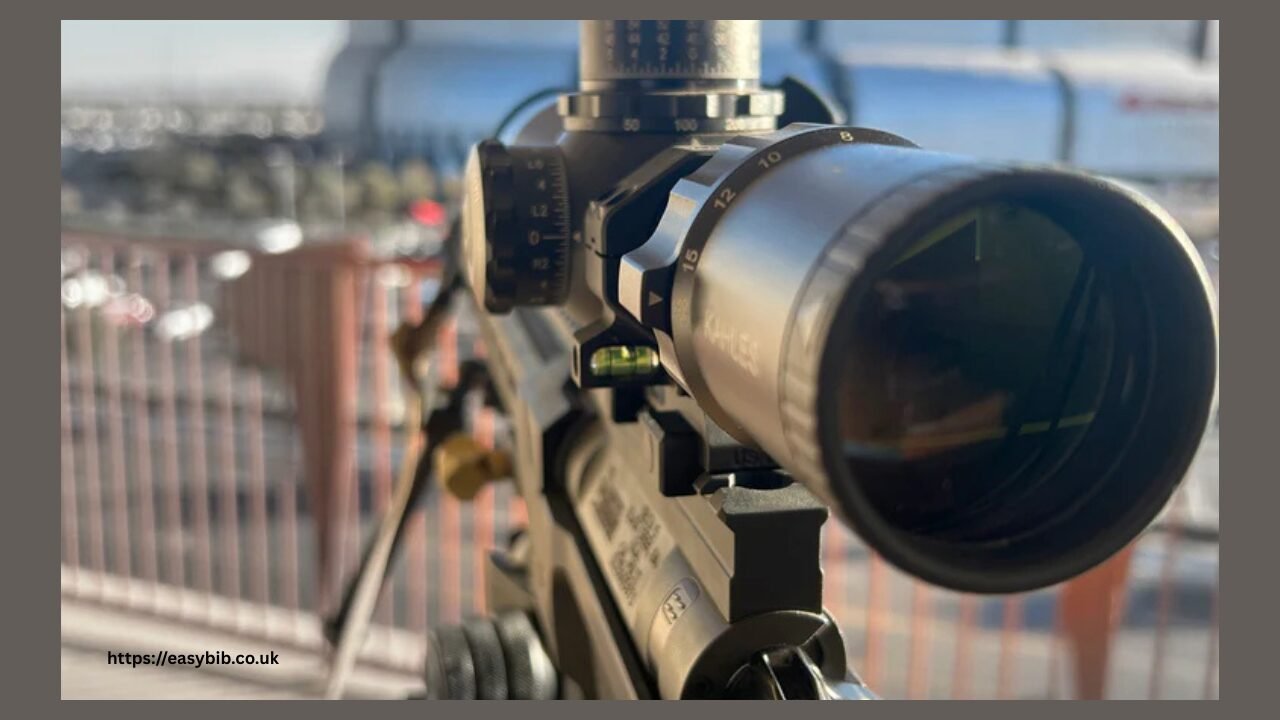
Mounts aren’t just about holding your optic in place; they determine height, alignment, and stability under recoil. A high-quality system ensures your optic stays true, even through thousands of rounds. And when you add in considerations like co-witnessing with iron sights, the role of mounts becomes even more critical.
Why Mounts Matter More Than You Think
Many shooters spend time carefully selecting optics, but often underestimate the importance of the mounting system. Even the best optic won’t perform if the mount shifts or fails. Both scope mounts and optic mounts must provide stability, maintain zero, and allow repeatable performance if the optic is ever removed and reinstalled.
The height of the mount is one of the most critical factors. Too low, and your irons may be blocked; too high, and your sight picture or cheek weld can feel unnatural. The mount also determines whether you’ll achieve absolute co-witness or lower 1/3 co-witness with your iron sights.
Understanding Co-Witness Options
Co-witnessing refers to the alignment of your optic with your iron sights. This ensures that if your optic fails or loses power, you can immediately fall back on irons without changing your head position.
- Absolute co-witness: In this configuration, the reticle of your optic sits directly in line with your iron sights. Looking through the optic, you’ll see the front sight post perfectly centered under the reticle. The main benefit is consistency—your cheek weld and sight picture remain the same whether you’re using the optic or the irons.
- Lower 1/3 co-witness: Here, the optic is mounted slightly higher, so the iron sights appear in the lower third of the optic window. This reduces clutter in your sight picture, giving the reticle more open space, while still keeping irons available for backup.
Both approaches have their fans. Absolute co-witness is often chosen for duty or defensive rifles, where redundancy is critical. In contrast, a lower 1/3 co-witness is popular for competition or recreational shooting, where speed and a clear sight picture are priorities.
Choosing Between Scope Mounts and Optic Mounts
The terms are often used interchangeably, but they sometimes refer to slightly different roles. Scope mounts typically hold magnified optics, while optic mounts are designed for red dots, holographic sights, or reflex optics. Regardless of the name, the purpose remains the same: to secure your sighting system firmly and at the correct height.
When selecting mounts, consider these factors:
- Durability and stability – The mount should withstand recoil without shifting or movement. Machined aluminum mounts are popular for their strength-to-weight balance.
- Height and eye relief – Ensure the mount positions the optic at the correct height for co-witnessing and a comfortable cheek weld.
- Compatibility – Check that the mount fits both your optic footprint and your rifle rail system.
- Ease of installation – Quality mounts allow for simple installation and consistent torque. Some also offer quick-detach features for easy removal and reattachment.
Steps for Setting Up Your Mounting System
Setting up the proper system involves some planning and adjustment. Here’s a simple process:
- Zero iron sights first – Establish a baseline with your irons so that when you mount your optic, alignment is easier.
- Install your mount – Place the chosen scope mounts or optic mounts on your rifle’s rail, securing them with the recommended torque.
- Mount the optic – Adjust forward or backward to achieve proper eye relief for magnified scopes, or a clear sight window for red dots.
- Confirm co-witness – With the optic mounted, check whether your iron sights line up with the reticle (absolute co-witness) or sit in the lower third of the window (lower 1/3).
- Zero the optic – Fine-tune adjustments so that both systems align accurately at your chosen distance.
- Test under live fire – Shoot a few groups to ensure nothing shifts and transitions between irons and optics are seamless.
Real-World Applications
Different shooters benefit from different setups:
- Defensive use – Many prefer absolute co-witness for its consistency and reliability in high-stress scenarios.
- Competition shooting – Lower 1/3 co-witness can provide faster sight acquisition by decluttering the reticle view.
- Hunting – Sturdy scope mounts that provide consistent eye relief are essential when using magnified optics in outdoor conditions.
- Training and range use – Co-witnessing provides an excellent opportunity to practice transitioning between optics and irons, thereby building confidence in both the optics and the irons.
Material and Design Considerations
Most quality mounts are made from lightweight aluminum alloys, offering durability without unnecessary weight. Steel mounts are also available, providing strength but adding weight. Some mounts are modular, allowing shooters to adjust height or switch between absolute and lower 1/3 co-witness setups. One-piece mounts are standard for scopes, offering improved stability and alignment, while separate ring systems provide greater flexibility in positioning.
The finish also matters. Hard-anodized coatings resist scratches, while protective designs shield screws and fasteners from loosening under recoil.
Training with Co-Witness Systems
Once your setup is in place, practice is key. Try turning your optic off during drills and using your irons through the optic window to simulate optic failure. Switch back and forth until the motion feels natural. With absolute co-witness, the transition is seamless; with lower 1/3, you may need a slight adjustment in sight alignment, but the process is still quick and efficient.
Drills like these build confidence, ensuring you’re ready for any scenario. Whether it’s a competition stage, a hunt, or a defensive situation, having a co-witnessed system means you always have a backup.
READ MORE
Why the Mount Matters
Choosing the proper scope mounts or optic mounts is more than a technical detail—it’s about building a reliable, flexible system that matches your shooting style. By understanding co-witnessing and determining whether absolute co-witnessing or a lower 1/3 works best for you, you can create a setup that’s both practical and adaptable.
With solid mounts, proper installation, and consistent practice, your rifle becomes more than just a tool—it becomes a dependable extension of your skills. And when your equipment works seamlessly, you can focus less on adjustments and more on enjoying the experience of shooting itself.