Table of Contents in Word – Insert, Update & Customize Easily

A Table of Contents (TOC) is one of the most useful tools when working with long documents in Microsoft Word. It lists all the major sections and their page numbers in one place. This helps readers understand the document’s structure before they start reading. It also saves time by allowing them to quickly jump to any section they want.
Microsoft Word makes it simple to create, update, and customize a TOC without doing everything manually. Whether you are working on an academic thesis, a business report, or a book, using this feature makes your document look professional and well-organized.
Why a Table of Contents is Important?
A TOC is plays a key role in navigation. Readers can glance at the TOC to get a quick overview of the topics. It improves user experience, especially for digital documents, because Word automatically creates clickable links.
This means a reader can click on a heading and instantly go to that page. It also improves readability because readers do not need to scroll or search manually. For printed reports, the TOC works as a quick reference guide. In short, a well-made TOC adds professionalism and usability to your document.
Preparing Your Document Before Adding a TOC
Before inserting a TOC, it is essential to format your document correctly.
Use Word’s Heading Styles
Word uses heading styles to know which text should appear in the TOC. Select your main headings and apply Heading 1. Use Heading 2 for sub-sections, and Heading 3 for smaller sections. This hierarchy is important. If you only make headings bold or larger manually, Word will not detect them as headings. Using heading styles ensures that the TOC updates correctly when you make changes to the document later.
Keep the Structure Consistent
Use headings consistently throughout your document. Do not skip heading levels unnecessarily. For example, do not use Heading 3 without using Heading 2 first. This keeps the TOC logical and easy to follow.
How to Insert a Table of Contents
Inserting a TOC in Word takes just a few clicks.
Step-by-Step Guide
- Place your cursor where you want the TOC to appear, usually after the title page.
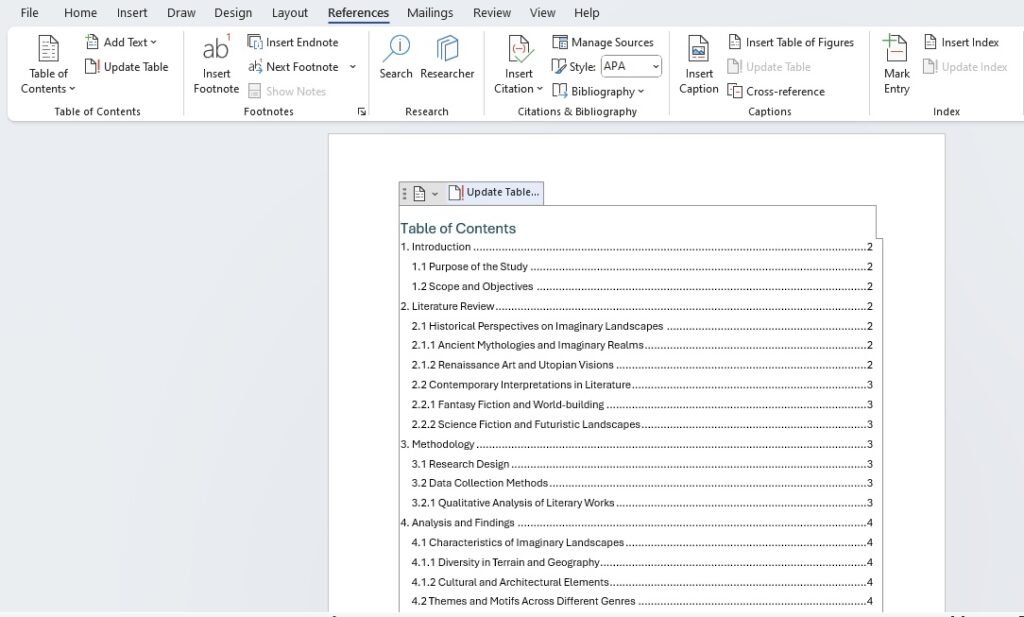
- Go to the References tab in the Word ribbon.
- Click Table of Contents in the Table of Contents group.
- Choose one of the Automatic Table options.
Word will instantly generate the TOC based on your headings. If you have used headings correctly, all the sections will appear automatically with their correct page numbers.
Updating the Table of Contents
After making edits to the document, you must update the TOC to reflect the changes.
- Click anywhere inside the TOC to highlight it.
- On the top, click Update Table or right-click and choose Update Field.
- Select Update page numbers only if only the length of sections changed.
- Select Update entire table if you added, removed, or renamed headings.
This process ensures that the TOC always stays accurate.
Customizing Your Table of Contents
Word allows full customization of the TOC to match your preferred style.
Choosing Heading Levels
You can control how many heading levels appear in the TOC. For shorter documents, showing only Heading 1 and Heading 2 is enough. For detailed reports or books, you can include Heading 3 or more.
Changing Layout and Design
Go to References → Table of Contents → Custom Table of Contents. Here, you can:
- Change the font, size, and alignment of TOC text.
- Show or hide page numbers.
- Choose a tab leader style (dots, dashes, or none).
- Modify the look of each heading level using the Modify button.
This allows you to create a clean and professional TOC that matches your document design.
Manual vs Automatic Table of Contents
Word offers two ways to create a TOC.
- Automatic TOC: This is the recommended method. Word generates and updates it based on your headings. You only need to click “Update Table” when changes are made.
- Manual TOC: This option gives you placeholder text. You type in the entries and page numbers manually. This is time-consuming and prone to errors. It is useful only for very short documents or custom layouts.
Using Table of Contents Templates
Microsoft Word comes with built-in TOC templates. These include Automatic Table 1, Automatic Table 2, and a Manual Table. Each template has its own style and layout. You can select one that best matches your document. You can also customize a TOC and save it as part of a document template for future use. This is very helpful for businesses or students who create multiple reports using the same format.
Common Issues and How to Fix Them
Sometimes your TOC might not work as expected.
- Headings Missing: This happens when you don’t use heading styles. Apply Heading 1/2/3 styles and update the TOC.
- Wrong Page Numbers: Update the entire table after making changes to the document.
- Too Many Levels Showing: Change the number of levels under the Custom TOC settings.
- Formatting Problems: Modify the TOC styles to reset fonts, colors, and spacing.
Best Practices for a Professional TOC
Follow these tips for the best results:
- Always use heading styles instead of manually formatting headings.
- Insert the TOC after completing most of the document writing.
- Keep the TOC simple and clean. Do not include unnecessary levels.
- Update the TOC before finalizing or printing the document.
- Save your customized TOC as a template for future projects.
Conclusion
A Table of Contents in Microsoft Word is more than just a list of headings. It is a powerful tool that makes your document easier to read and navigate. By using Word’s built-in heading styles and automatic TOC feature, you save time and avoid errors that come with manual formatting.
Customization options allow you to adjust the design to match the rest of your document. Whether you are working on an academic paper, a business report, or a book, a well-structured TOC improves both professionalism and user experience. Always remember to update the TOC before sharing or printing your work, ensuring that every page number and heading is accurate.