How to Install a Cat Proof Fence for Maximum Security
Keeping cats safe outdoors is a big worry for pet owners. Cats love to explore, but letting them roam freely can put them in danger from cars, other animals, and harmful things they might find. A cat-proof fence is a great way to solve this problem.
A good cat-proof fence creates a safe boundary that prevents your cats from escaping while still allowing them to enjoy being outside. Unlike other methods, these fences don’t limit where your cat can go in your yard and won’t hurt them when installed correctly.
In this guide, I’ll show you how to install a cat-proof fence that works. We’ll look at checking your current wall, picking the right materials, installing everything step by step, and keeping it working well over time. By following these tips, you can create a safe outdoor space for your cats that protects them while allowing them to act naturally.
Preparing for Installation
Assessing Your Existing Fence
Before installing a cat-proof system, check your current fence carefully. The success of your cat barrier depends a lot on how good your existing wall is.
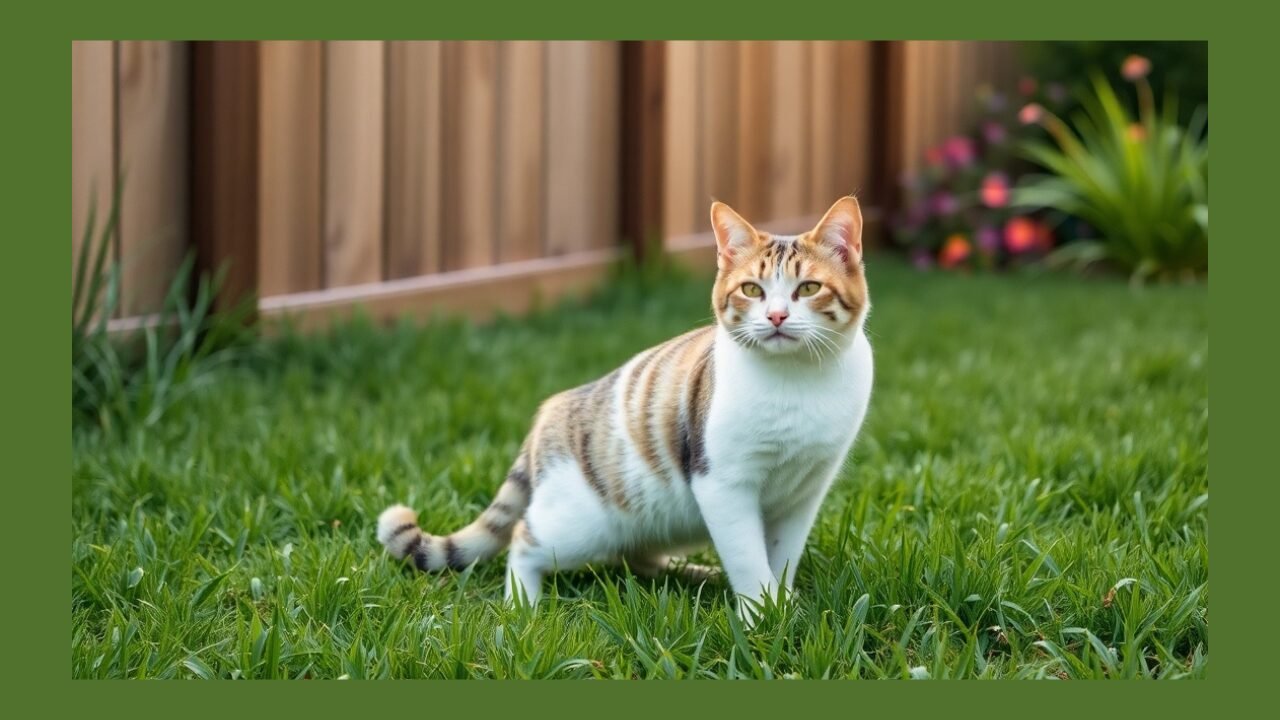
First, check how tall your fence is. It should be at least 1.83 meters (6 feet) high. If it’s shorter, cats might be able to jump over it, especially athletic cats. You might need to make your fence taller before adding cat-proofing. For super jumpy cats like Bengals, many experts suggest at least 2 meters.
Next, walk around your whole fence looking for damage. Check for loose boards in wooden fences, rust in metal fences, cracks in brick walls, leaning posts, and gaps at the bottom or between panels. Take pictures of any problems you find to help plan repairs.
Fix any problems before installing your cat-proofing. Replace rotted boards, treat rust on metal fences, and repair cracks in walls. A cat containment system will only work if the fence it’s attached to is strong.
Also, look for things near your fence that cats could use to climb over, like trees or sheds. You might need to add extra protection in these areas. Try to keep at least 1.5 meters between any climbing aids and your fence.
Choosing the Right Materials
Picking the right materials for your cat proof fence is super important. The system needs to keep your cat from escaping and withstand all kinds of weather throughout the year.
Use parts made specifically for keeping cats in, rather than trying to make do with regular fencing materials. Purpose-built systems, such as rotating paddles or angled barriers, have been tested with various cat breeds to ensure they work.
When choosing materials, look for: weather resistance (materials should handle rain, sun, and temperature changes), durability (parts should last for years), compatibility (the system should work with your fence type), safety (no sharp edges that could hurt your cat), and visibility (think about whether you want the system to be noticeable or not). Experts recommend UV-stabilised plastics and marine-grade stainless steel for the longest life.
Different fence types need different mounting methods. Wooden fences take screws easily, but brick walls need drilling and wall plugs. Metal fences often need special brackets. Make sure the system you choose comes with the proper hardware for your fence type or that you can get compatible hardware separately.
Quality materials might cost more at first, but they save money over time because they last longer. Experts say premium materials often last 10–15 years, while cheaper ones may last just 2–3 years.
Tools and Materials You Will Need
Getting everything ready before you start will make installation much easier. Here’s what you’ll need for a good-quality installation:
Essential Tools:
- Electric drill with appropriate bits (including masonry bits if mounting to brick or concrete)
- Screwdriver (both Phillips and flathead) with multiple sizes to accommodate various fasteners
- Measuring tape (at least 5 metres long) with clear markings for precise measurements
- A spirit level 24″ or longer ensures precise, straight installation
- Use a pencil or weatherproof marker to mark positions accurately
- Hacksaw or appropriate cutting tool for trimming components to exact specifications
- A ladder or step stool for reaching higher sections safely
- Safety gloves with cut resistance for protection during installation
- Safety glasses to protect the eyes from debris during drilling
- Hammer for minor adjustments and securing components
For a typical installation covering about 12 metres of fence, a basic kit like the Oscillot® 12.4 Metre Cat-Proof Fence Kit would include 10 Paddles, 13 Dual Knuckle Post Kits, and mounting hardware. This gives you everything you need for a standard rectangular yard.
For bigger yards, you’ll need larger kits, like the Oscillot® 24.8 Metre Kit, which has 20 paddles and 24 dual knuckle post kits. Experts suggest buying about 10% more materials than your measurements show you need, to account for mistakes and future repairs.
The exact parts will vary depending on which system you choose and your fence type. Always check the manufacturer’s instructions for exact requirements and recommended spacing between parts.
Step-by-Step Guide to Installing a Cat-Proof Fence
Step 1: Measure and Plan Your Layout
Good measuring and planning are key to a successful installation. This first step ensures you have enough materials and helps identify potential problems before you start the actual installation.
Start by measuring your entire fence line where you’ll install the cat-proof system. Measure the dimensions with a tape and record them. Don’t just guess – accuracy is essential for ordering the right amount of materials. Experts suggest measuring each section twice to be sure.
When measuring, pay special attention to corners (note the number and type), gates and entrances (measure these separately), changes in fence height or style, and any obstacles (such as trees or utility poles). These details help you figure out where you might need special parts or custom solutions.
After measuring, draw a simple map of your property that shows the fence, gates, and any other special features. This visual helps you plan where to put components and identify potential problem areas. Many professionals use graph paper to make scale drawings.
Based on your measurements and the manufacturer’s specifications, calculate the number of components you’ll need. Most systems are sold in linear meter increments, so round up to make sure you have enough. For example, if your fence is 18 meters long, you would need an 18.6-meter kit or larger. Experts suggest adding 5-10% more to your calculation for waste, mistakes, or future repairs.
Finally, plan your installation sequence. It’s usually best to start at a corner or gate, work in sections rather than trying to do the whole fence at once. Finish one section before moving to the next, and leave gates until last, because they often require special attention.
Step 2: Prepare the Fence Surface
Getting your fence ready is crucial for a secure, long-lasting installation. This step involves cleaning the wall and fixing any issues that might affect how well your cat-proof system attaches.
First, check your entire fence line carefully. Look for sticking-out nails or screws, loose boards or panels, plants growing on the fence, cobwebs or bird nests, and rotted or damaged areas. Make a list of these issues so you don’t miss any during preparation.
Clean the fence where you’ll attach components. For wooden fences, brush away dirt and, if necessary, use mild soap to remove grime. For metal fences, wipe down the mounting areas using a degreaser, if required, for dirty surfaces. If your fence was recently painted, make sure the paint is fully dry (usually takes about 30 days) before mounting anything to it.
If your fence has an uneven top, like pointed pickets, you may need to install a flat board horizontally along the top to create a level surface for attaching the cat-proof system. Use pressure-treated lumber for outdoor use, and attach it securely with galvanised or stainless steel fasteners.
For wooden fences, check for rot, especially at ground level and near joints. Replace any bad sections before continuing. For metal fences, fix any rust by sanding and applying rust-inhibiting primer. Badly rusted sections might need replacement.
Trim back any plants that touch the fence, creating at least 30 cm of clearance. This stops cats from using plants to climb and keeps vegetation from interfering with moving parts.
If your fence has gaps at the bottom larger than 5 cm, block these to prevent cats from squeezing underneath. Wire mesh or boards can close these gaps securely.
Finally, mark where the brackets or mounting hardware will go. Use a pencil or a temporary marker, following the manufacturer’s spacing recommendations. Typically, brackets are spaced about 1 to 1.5 meters apart, with extra brackets at corners and transition points.
Step 3: Attach the Mounting Brackets
The mounting brackets are the foundation of your cat-proof fence system, so installing them correctly is super essential for long-term stability. This step needs precision to ensure the brackets are securely fastened and correctly positioned.
First, gather all your mounting brackets and the correct fasteners for your fence type. For wooden fences, wood screws work well (stainless steel or galvanized, at least 30mm long). For metal fences, you might need self-tapping screws or bolts with nuts. For brick walls, you’ll need wall plugs and masonry screws rated for outdoor use.
Position the first bracket at your starting point, ensuring it is level (use a spirit level to check). It should be at the right height according to the instructions, properly aligned with the fence line, and positioned to allow for the correct overhang angle. Most systems need the bracket to be mounted flush with the top edge of the fence for best results.
Mark the screw holes with a pencil, then pre-drill if needed (especially important for hardwood fences to prevent splitting). For brick walls, use a hammer drill with a masonry bit. Pre-drilling should be about 80% of the screw diameter for best grip without splitting the material.
Attach the bracket using the correct fasteners, ensuring it is firmly secured but not overtightened, as this could damage the bracket or the fence.
Continue installing brackets along the fence line at the intervals specified in your system’s instructions. Typical spacing is between 1 and 1.5 meters, but this may vary depending on the specific system. Keep the height and alignment consistent throughout. Using a string line or laser level can help ensure all brackets are perfectly aligned.
For corners, follow the manufacturer’s specific instructions, as corner installations often differ from straight runs. Some systems need special corner brackets, while others use standard brackets installed at particular angles.
For gates, install brackets on both gate posts, making sure they align with the brackets on the adjacent fence sections. The gate itself may need a different approach, which should be detailed in your system’s instructions.
After installing all brackets, check each one for stability. They should feel solid with no movement or wobbling. Fix any loose brackets before moving on.
Step 4: Install the Barrier System
With the mounting brackets securely in place, you can now install the actual barrier components that will stop your cat from climbing over the fence. This typically involves attaching paddles, rollers, or mesh panels to the brackets that you have installed.
Start by unpacking all barrier components and arranging them in order along the fence line. This organisation will make the installation process more efficient. If components need to be assembled before installation, follow the manufacturer’s instructions carefully.
For rotating paddle systems like the Oscillot®, align the paddle with its mounting bracket, ensuring it is oriented correctly according to the manufacturer’s guidelines. Insert the paddle into the bracket according to the instructions, check that the alignment pins or guides are properly engaged, and secure it using the provided fasteners or locking mechanism. Make sure the paddle rotates freely without obstruction. Test the full range of motion and check that the paddles overlap slightly at their ends to prevent gaps that cats could exploit.
At corners, special attention is needed to maintain the integrity of the barrier. Some systems require corner pieces or adaptors, while others can be bent or adjusted to navigate the corner. Follow the specific instructions for your system.
For gates, install the barrier components on the gate structure itself, if possible, ensuring they align with the adjacent fence sections when the gate is closed. If the gate cannot accommodate the barrier system, consider alternative solutions such as a separate enclosure or supervised access only through the gate area.
Throughout the installation, periodically step back and visually inspect your work to ensure it has a consistent height, angle, and appearance. This allows you to catch and correct any problems before completing the entire installation.
Step 5: Secure and Test the System
The final step in installing your cat-proof fence is to thoroughly secure all components and test the system to make sure it works. This crucial phase ensures that your installation will reliably contain your cat and identifies any potential weaknesses before your pet has a chance to discover them.
Begin by conducting a complete inspection of the entire installation. Walk the perimeter and check that all brackets are firmly attached to the fence, all barrier components are securely fastened to their brackets, rotating elements move freely without binding, there are no gaps between sections large enough for a cat to squeeze through, corner installations provide continuous protection without weak points, and gate areas are properly secured when gates are closed.
Tighten any loose fasteners and adjust any components that aren’t correctly aligned. Pay particular attention to transitions between different sections of the fence, as these are often the weakest points in the system.
Next, test the physical security of the installation by gently pushing on various points. The components should stay firmly in place without bending, breaking, or coming loose. For rotating systems, make sure that all paddles or rollers spin freely and return to their rest position.
If possible, try to climb or reach over the fence yourself (safely) to identify potential weaknesses from a cat’s point of view. Look for any points where a determined cat might gain purchase or leverage.
Check for any nearby trees, structures, or furniture that could serve as launching points for an athletic cat to bypass your fence system. Address these potential issues by trimming branches, moving items, or extending the protection to cover these areas.
Take photos of your installation for future reference. These can be helpful if you need to make repairs or changes later, or if you’re communicating with the manufacturer about any issues.
Finally, prepare for introducing your cat to the newly secured area. At first, supervise your cat outdoors to see how they interact with the fence system. Most cats will investigate the barrier but quickly learn that they cannot climb over it. This supervised introduction period is essential to ensure the system works effectively with your specific cat’s behaviour. Cat behaviour experts recommend at least three supervised sessions before allowing unsupervised access to the contained area.
Tips for Maximum Security
Reinforce Corners and Gate Areas
Corners and gates are usually the most vulnerable parts of a cat containment system. These areas need special attention to ensure they don’t become the weak link in your security perimeter.
For corners, the challenge is maintaining continuous protection while changing direction. Depending on your specific cat-proof fence system, you may need to install additional brackets or supports at the corners for extra stability. You can also use purpose-designed corner pieces if available for your system. Ensure that barrier components overlap correctly at the corners, leaving no gaps. Consider using extra cable ties or wire to reinforce the corner connections. Professionals recommend using twice as many fasteners at corners for maximum security.
Gate areas present unique challenges because they have moving parts and potential gaps. To reinforce gate areas, make sure the gate closes firmly with no significant gaps at the bottom or sides, install the cat proof system on the gate itself if possible, making sure it lines up with adjacent fence sections when closed, consider installing a separate overhead barrier that spans the gate area for gates that cannot accommodate the barrier system, use weatherstripping or brush strips to seal gaps between the gate and posts, and install a self-closing mechanism to prevent the gate from being accidentally left open.
External corners (where the fence angles outward) are particularly vulnerable as they may provide climbing leverage for determined cats. These corners may benefit from additional height or extended barriers.
Remember that the security of corners and gates may be affected over time due to settling, weather, or regular use. Include these areas in your regular inspection routine and check for developing gaps or loose components.
Regular Inspections and Maintenance
A cat-proof fence system needs ongoing attention to stay effective. Setting up a regular inspection and maintenance routine will help identify and fix potential issues before they compromise your cat’s security.
Create a schedule for thorough inspections—monthly is ideal for the first year, then quarterly once the system has proven stable. During these inspections, walk the entire perimeter, checking each section of the barrier, make sure all brackets remain firmly attached to the fence, verify that all barrier components are securely fastened to their brackets, test any moving parts (like rotating paddles) to confirm they operate smoothly, look for signs of wear, UV damage, or weathering on plastic components, check for rust or corrosion on metal parts, and inspect for damage from falling branches, lawn equipment, or other impacts.
Seasonal maintenance is also essential. After winter, check for damage from frost, snow, or ice. In spring, remove any climbing plants that may have started growing on the fence. During the summer, ensure that expanding or contracting materials haven’t created gaps. In autumn, clear fallen leaves that might block moving components.
Keep spare parts on hand for quick repairs, especially the components that are most likely to need replacement over time. This typically includes fasteners, brackets, and any plastic components exposed to the sun.
After extreme weather events such as strong winds, heavy snow, or flooding, do an extra inspection, as these conditions can damage even well-installed systems.
Maintain the area around the fence by trimming vegetation regularly and removing any items that could be used as climbing aids. A cleared zone of at least 1 meter around the wall is ideal.
Remember that preventive maintenance is always more effective and less costly than emergency repairs after a cat has escaped. According to experts, regular maintenance can extend the lifespan of a cat containment system by 50 to 100%.
Tailoring Solutions to Your Cat’s Behaviour
Every cat has a unique personality and set of behaviours that may influence how they interact with containment systems. Knowing your cat’s behaviour helps you customise extra security for better effectiveness.
Begin by watching how your cat explores your yard. Note their preferred paths, areas of interest, and any attempts they make to test boundaries. This observation period will help you identify potential weak points specific to your cat’s behaviour.
For particularly athletic or determined climbers, consider these enhanced security measures: increase the overall height of your fence system to at least 2.1 meters, add a second row of deterrent at a lower height for cats that are good jumpers, extend the overhang width for additional deterrence (up to 30cm for extremely determined climbers), or install additional barriers around trees or structures that could serve as launching points.
For diggers who might try to go under the fence, extend wire mesh underground in an L-shape outward from the wall (at least 30cm deep and 30cm outward), place large rocks or pavers along the fence line to create a solid barrier, make a concrete curb at the base of the fence (minimum 15cm deep), or install commercial dig guards explicitly designed for this purpose.
Some cats are motivated by what they can see on the other side of the fence. If your cat seems fixated on neighbouring animals or activities, consider adding visual barriers like shrubs or decorative screens to reduce this stimulation.
Add fun elements within your yard to make the contained space more appealing than what lies beyond. Cat-friendly features might include climbing structures, sheltered resting spots, plants like catnip or cat grass, bird feeders positioned for safe viewing, shaded areas for hot weather, and sunny spots for lounging in cool weather.
Finally, understand that adaptation takes time. When first introducing your cat to a newly secured yard, use positive reinforcement to create good associations with staying within boundaries. Supervised introduction periods allow you to correct any testing behaviours and reinforce the idea that the yard is a safe, enriching environment.
Common Installation Mistakes to Avoid
Leaving Gaps at the Base or Top
One of the most common errors in cat-proof fence installation is failing to address gaps that can provide escape routes for determined cats. These openings, whether at the base of the fence or between components, can quickly make an otherwise good system ineffective.
At the base of the fence, gaps as small as 5-7 cm can be enough for a cat to squeeze through. Common problems include uneven ground creating spaces under the fence, erosion gradually creating new openings, gates with too much clearance underneath, and fence panels that don’t extend fully to the ground.
To fix these base gaps, install wire mesh along the bottom of the fence, extending it outward in an L-shape (at least 30cm outward) to prevent digging under, use concrete, rocks, or pavers to block gaps and create a solid barrier that won’t erode, install commercial dig guards or obstacles designed specifically for pet containment, or gates, add brush strips or flexible barriers that maintain contact with the ground while allowing the gate to open and close freely.
READ MORE
Conclusion
Installing a cat-proof fence is one of the most effective ways to create a safe, secure outdoor space for your cat. By carefully assessing your existing wall, choosing the right materials, following each installation step with precision, and maintaining your system regularly, you can dramatically reduce the risks your cat faces outdoors. Remember, consistent inspections and a focus on reinforcing weak points, such as corners and gates, will help ensure long-term success. With a properly installed cat-proof fence, you can give your cat the freedom to enjoy the outdoors safely and provide yourself with peace of mind.